Hak5 C2 Deployed in Google Cloud
Guide
Deploy HAK5 C2 Server on Google Cloud
I have to admit that HAK5 is making things pretty easy for pen-testers and security professionals with their new C2 server. The ability to use, deploy, and manage HAK5 gear remotely is a great thing. Personally, I use it for more blue team purposes that more offensive in my organization but with all HAK5 gear (in my humble option) it’s all about your imagination for its uses.
To find out more about the C2 platform,
click here.Install
We will be deploying the C2 server on a g1-small Google Cloud compute instance. You will also need a DNS name for your instance.
First, lets build a compute instance.
In the GCP dashboard, select “Compute Engine”, then select “VM instances”
In the VM instances dashboard, select “CREATE INSTANCE”


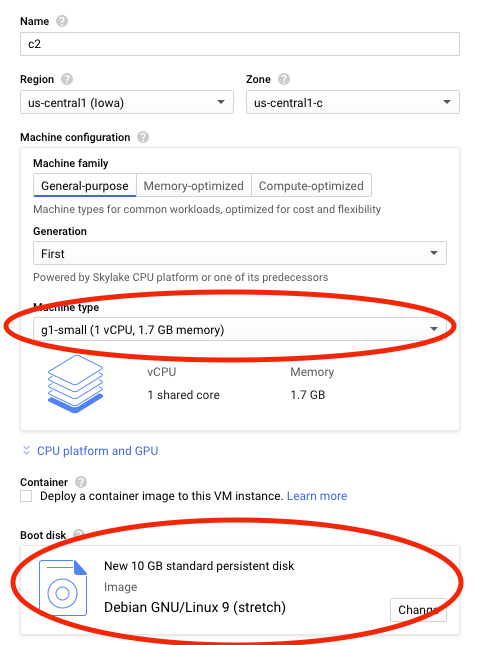
Name your instance, in this case I am using “C2”.
Select “g1-small” as the Machine Type and Debian GNU/Linux9 as the boot disk.
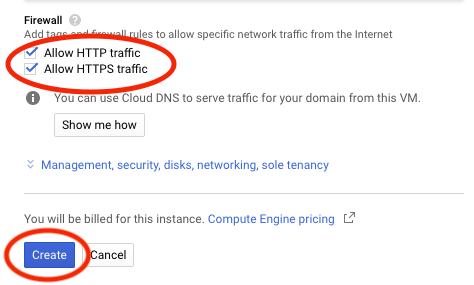
In the firewall section check to “Allow HTTP traffic” and “Allow HTTPS traffic” the click “Create”.
Note: Make sure you make a public DNS entry with your registrar pointed at your new compute instance.
While our instance is spinning up and our public DNS is propigating, let’s grab a C2 license from HAK5.
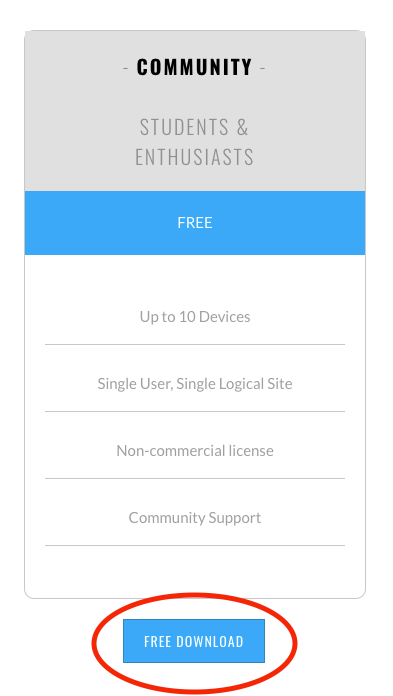
Go to https://shop.hak5.org/products/c2 and scroll all the way to the bottom. In this example I am choosing the Community Edition.
Verify the version of C2 you are wanting and click “Checkout”.
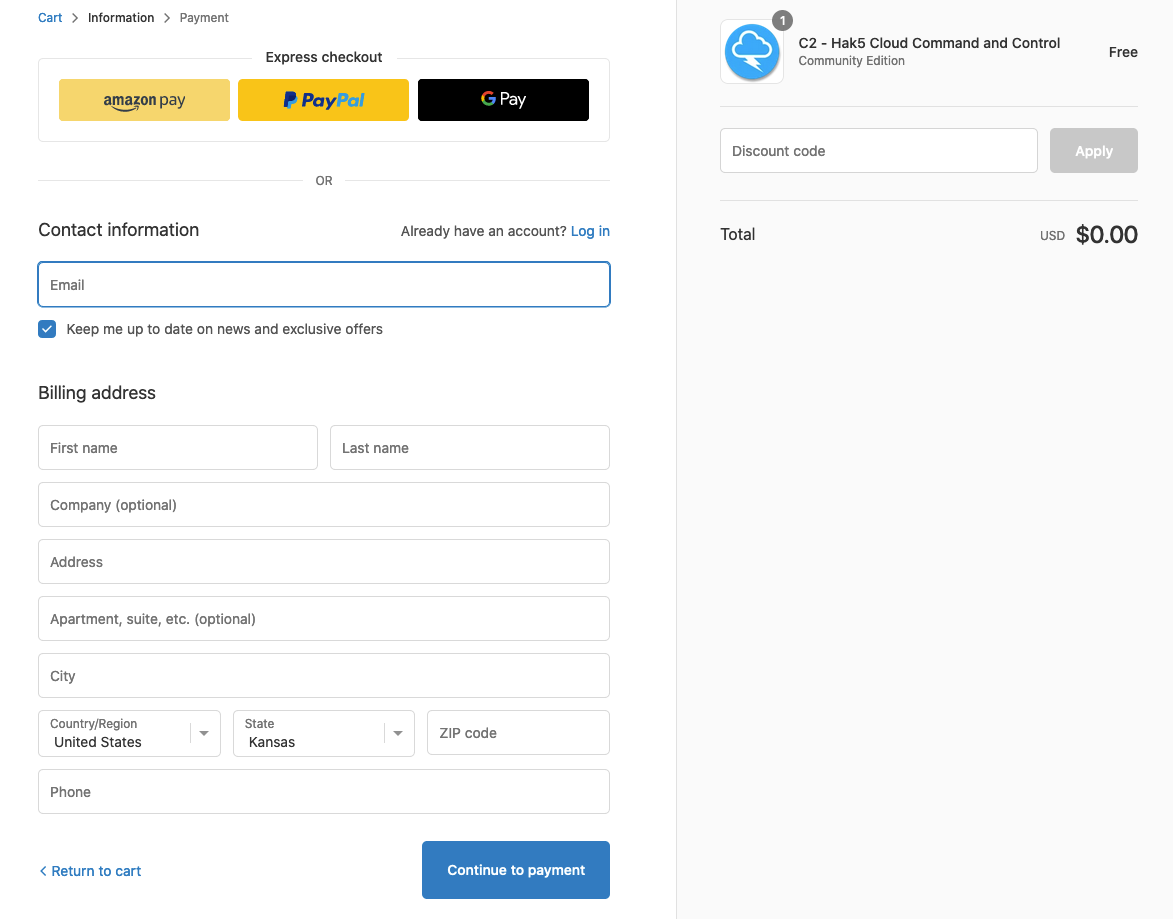
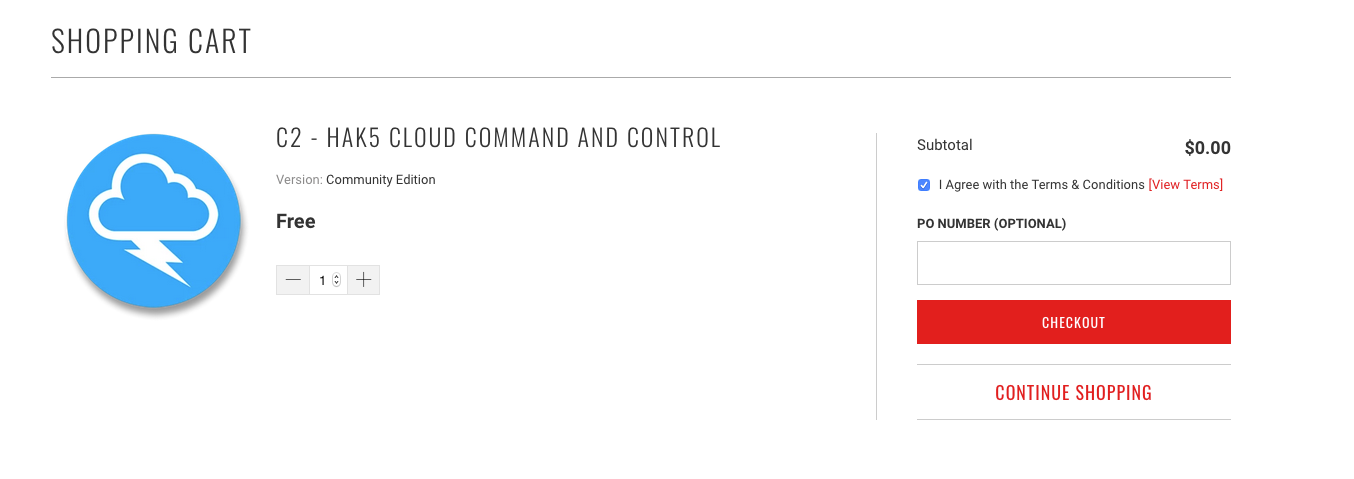
Fill out the the form to complete the purchase.
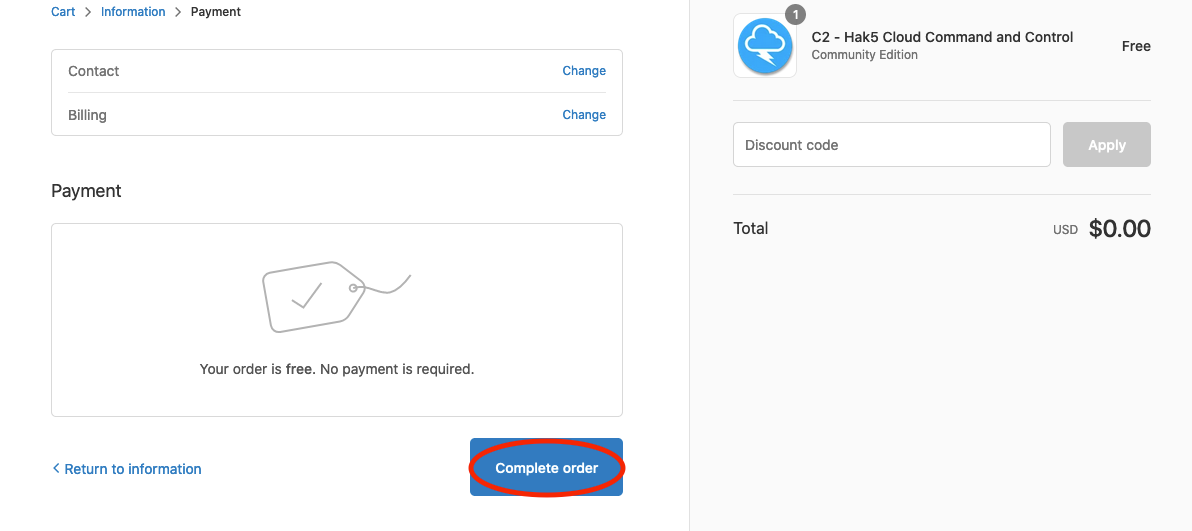
Click “Complete order” to finish the process.
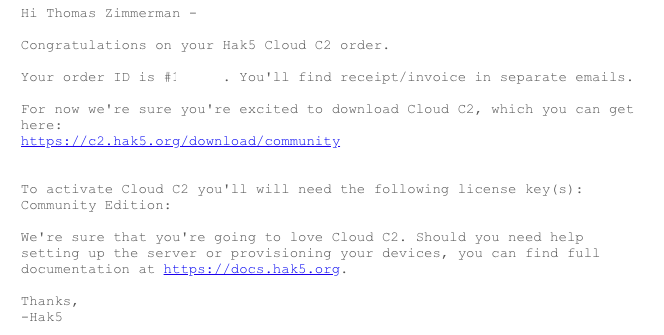
You will get two e-mails. The second e-mail will contain the license.
Finally, Let’s install the HAK5 C2 Server.
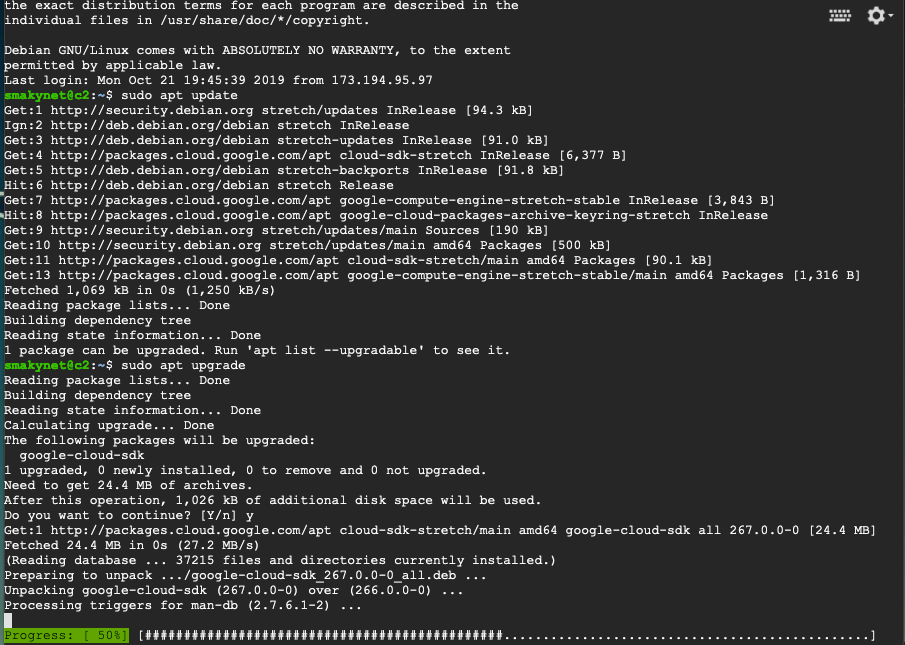
First, lets SSH into our C2 instance. Click on the “SSH” link under “Connect” on you C2 instance.

As always, we need to update the server:sudo apt update
sudo apt upgrade
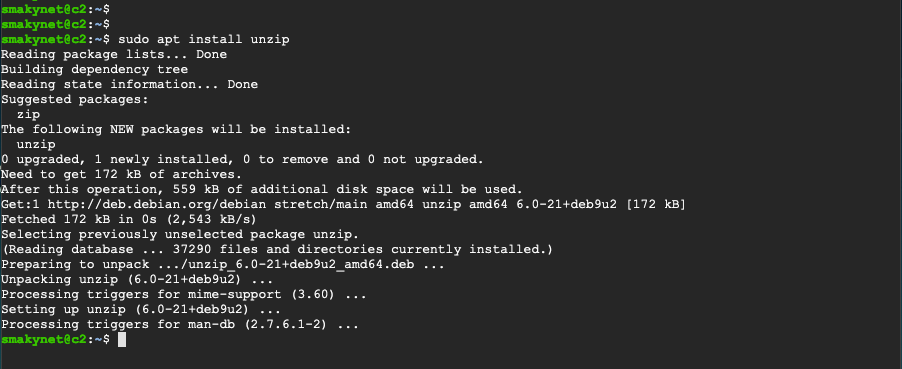
We will need to install unzip:sudo apt install unzip
Now we need to download HAK5’s C2 server install:
wget https://c2.hak5.org/download/community
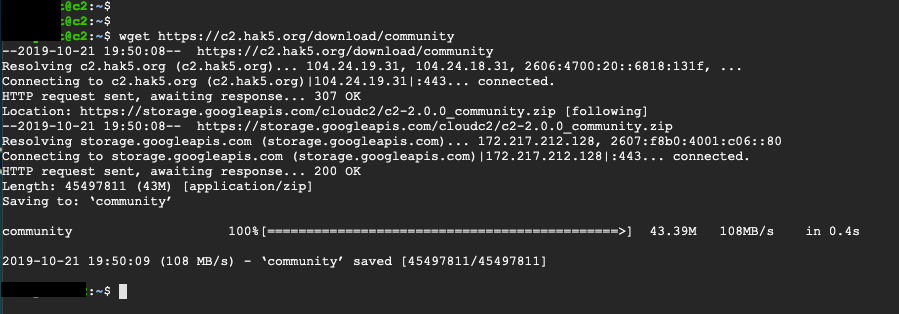
Unzip the C2 install files:
unzip community
Now we are ready to install and launch the C2 server:
sudo ./c2_community-linux-64 -hostname c2.subproject9.com -https
(Don’t forget to change “c2.subproject9.com” to your public DNS name”)

Now we are ready to install and launch the C2 server:
sudo ./c2_community-linux-64 -hostname c2.subproject9.com -https
(Don’t forget to change “c2.subproject9.com” to your public DNS name”)
Open your C2 using https://<DNS NAME>
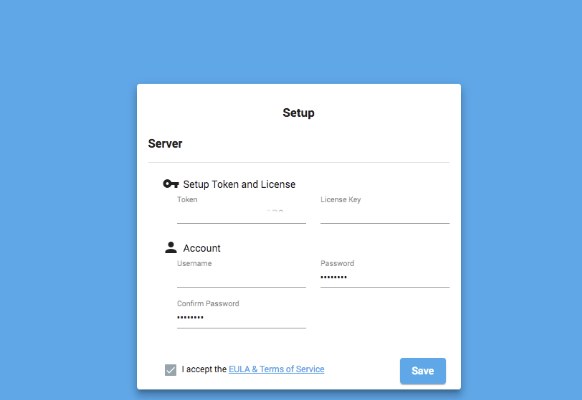
You will be shown a setup page to enter your license and create a user to login
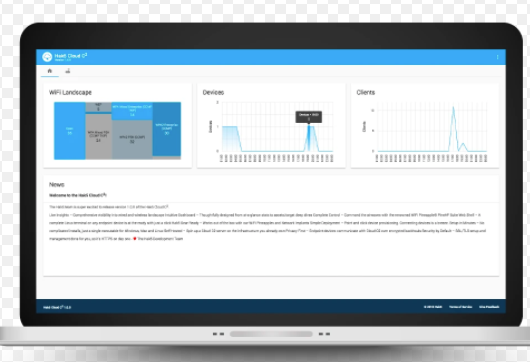
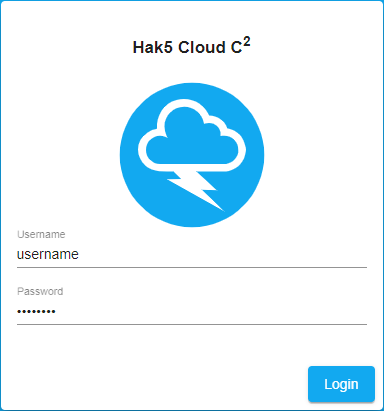
After you complete the setup you will be redirected to login to your very own Hak5 C2 Server.


